今回の記事は、ラズパイ3を自宅のLAN内のNTPサーバーにするものです。
単にNTPサーバーを立ち上げるのなら簡単そうですが、RTCモジュールを追加してみました。
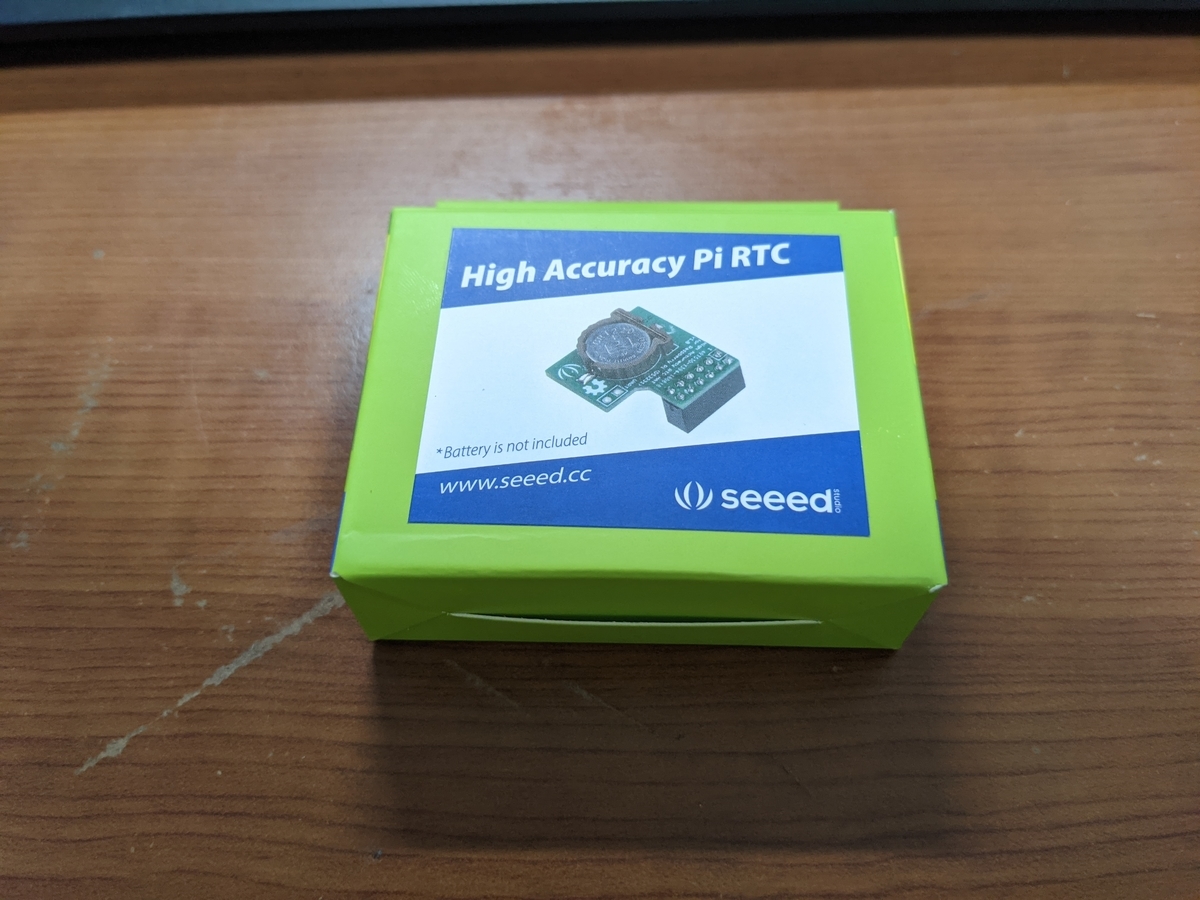
購入したRTCモジュールと電池はこれです。

")
- メディア: エレクトロニクス
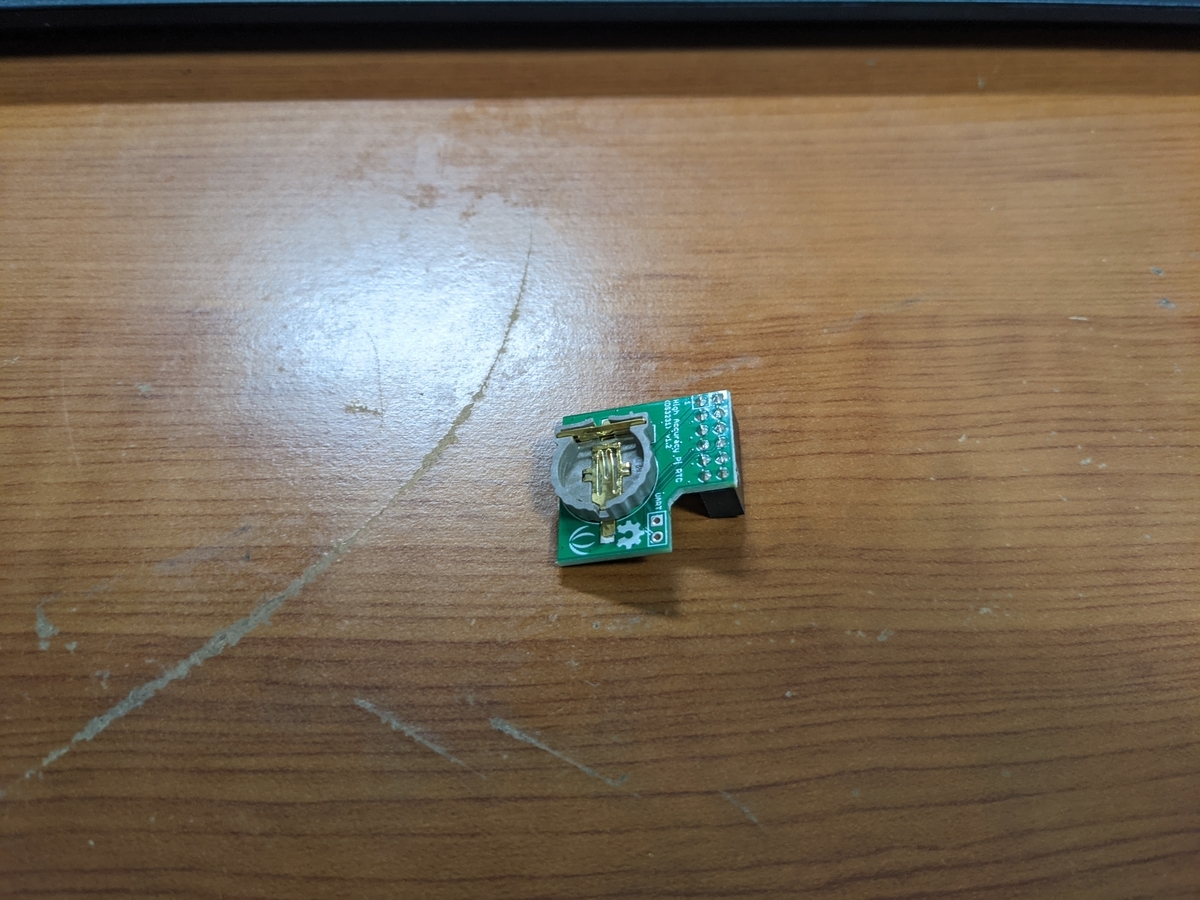
届いたものはこれになります。

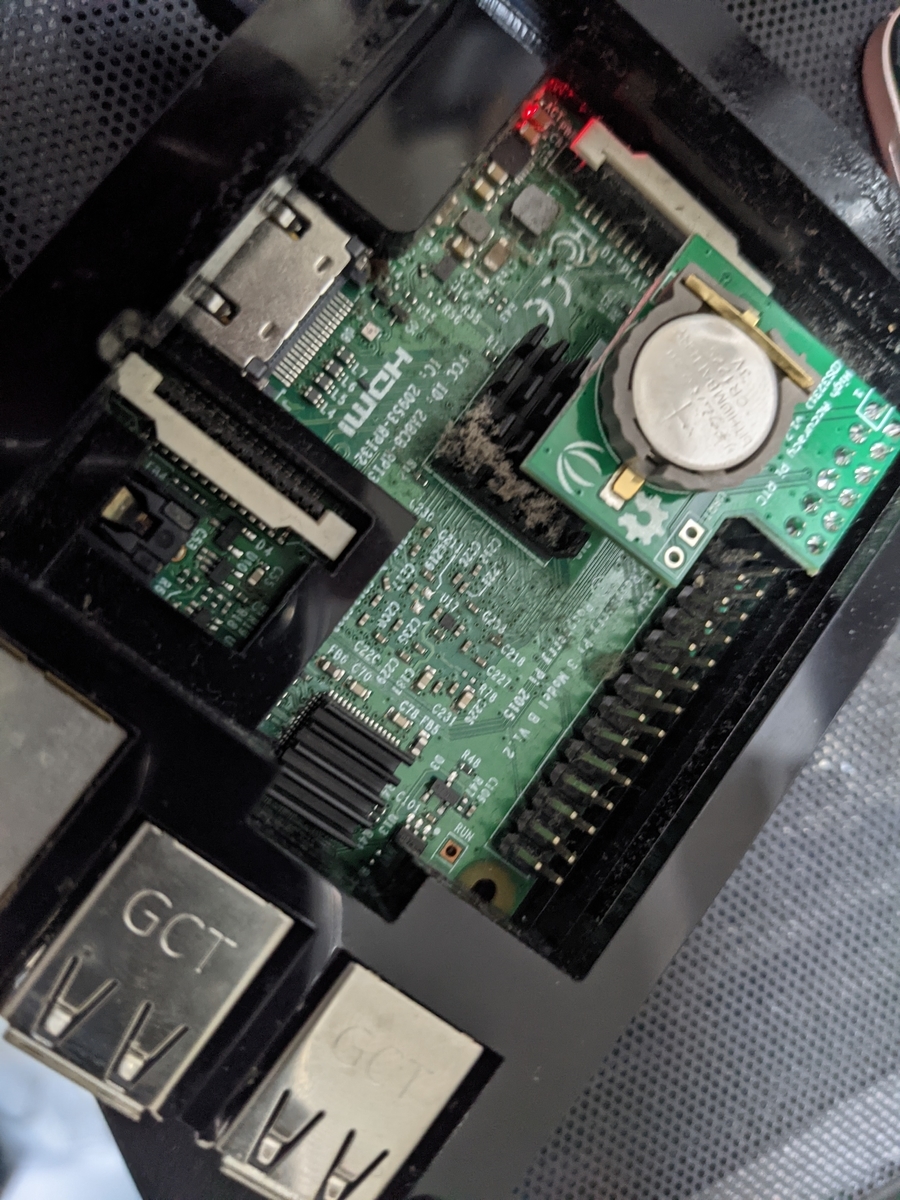
装着してみるとこんな感じになります。
今回使用するOSはUbuntu Serverの64bit版にしました。理由は、私が単にUbuntu Serverに慣れているからというだけですが。Ubuntu Serverの立ち上げとIP固定については割愛します。
RTCモジュールを有効にする前に、OSを最新化しておきます。続いて、ntpdateをインストールしておきます。これは、systemd-timesyncdサービスを無効化した後に手動で時間補正を行うためです。
sudo apt install ntpdate
標準でNTPサーバーに問い合わせに行くsystemd-timesyncdサービスを止めて無効化します。
sudo systemctl stop systemd-timesyncd
sudo systemctl disable systemd-timesyncd
念のため、timedatectlでntpをoffにしておきます。
sudo timedatectl set-ntp off
ここまでやってから再起動をかけてdateコマンドで時刻を見るとたしかにずれています。なので、逐次ntpupdateコマンドで同期を取ります。
sudo ntpdate ntp.nict.jp
ここからは、RTCモジュールの有効化です。Ubuntu Serverは最初からi2cが有効になっているらしいのですが、i2cdetectコマンドなどは入っていないのでまずはインストールしておきます。
sudo apt install i2c-tools
RTCモジュールを取り付け済みなら、i2cdetectコマンドで以下のような感じで確認がとれます。
sudo i2cdetect -y 1
     0  1  2  3  4  5  6  7  8  9  a  b  c  d  e  f
00:          -- -- -- -- -- -- -- -- -- -- -- -- --
10: -- -- -- -- -- -- -- -- -- -- -- -- -- -- -- --
20: -- -- -- -- -- -- -- -- -- -- -- -- -- -- -- --
30: -- -- -- -- -- -- -- -- -- -- -- -- -- -- -- --
40: -- -- -- -- -- -- -- -- -- -- -- -- -- -- -- --
50: -- -- -- -- -- -- -- -- -- -- -- -- -- -- -- --
60: -- -- -- -- -- -- -- -- UU -- -- -- -- -- -- --
70: -- -- -- -- -- -- -- --
今回購入したRTCモジュールは、SeeedというメーカーのDS3231です。そこで、Ubuntuに使えるかわかりませんが、メーカーが提供しているソースコードを使ってみます。
git clone https://github.com/Seeed-Studio/pi-hats.git
cd pi-hats
sudo ./tools/install.sh -u rtc_ds3231
なんかエラーがでますが、これはRaspbianを想定した作りになっているからなので無視してかまいません。ここまでやったら、以下のコマンドでRTCモジュールに書き込めるかテストできます。
sudo ntpdate ntp.nict.jp
sudo lsmod | grep ds1307
echo ds3231 0x68 | sudo tee /sys/class/i2c-adapter/i2c-1/new_device
sudo modprobe -r -v rtc_ds1307
sudo modprobe -v rtc_ds1307
sudo hwclock -w
timedatectlコマンド実行すると、RTC timeが反映されていることがわかります。
           Universal time: Wed 2021-04-14 18:09:46 UTC
                 RTC time: Wed 2021-04-14 18:09:46
ここまでで、RTCモジュールの認識確認は完了です。次は、OS起動時にRTCモジュールを認識させるようにします。やり方がわからないので、ググったものをベースに、/etc/init.d/rtc_i2cファイルを作成します。
/etc/init.d/rtc_i2c
#!/bin/sh

### BEGIN INIT INFO
# Provides:          RTC clock
# Required-Start:    mountdevsubfs
# Required-Stop:     mountdevsubfs
# Should-Stop:       umountfs
# X-Start-Before:    checkroot
# Default-Start:     S
# Default-Stop:      0 6
# Short-Description: Sync RTC clock and system clock time.
# Description:       Load the RTC driver and set to system clock.
### END INIT INFO
HWCLOCK=/usr/sbin/hwclock
MODPROBE=/usr/sbin/modprobe
RTC_MODULE=rtc_ds1307

set -e

# Include core init functions if needed
. /lib/lsb/init-functions

case "${1:-}" in
  stop)
    $HWCLOCK -w
    $MODPROBE -r -v $RTC_MODULE
    log_end_msg $? || true
    ;;


  start|reload|force-reload)
    $MODPROBE $RTC_MODULE
    echo ds3231 0x68 | tee /sys/class/i2c-adapter/i2c-1/new_device
    $HWCLOCK -s
    log_end_msg $? || true
    ;;
  restart)
    $0 stop ; sleep 2 ; $0 start
    ;;
  show-time)
    echo "hwclock: `$HWCLOCK -r`"
    date +"OS time: %F %T.%N"
    ;;
  *)
    log_action_msg "Usage: ${0:-} {start|stop|status|restart|reload|force-reload|show-time}" || true
    exit 1
    ;;
esac
参考にしたページではうまく動かなかったとありますが、以下の部分を変更したところ動くことを確認できました。
- modprobeなどを「/usr/sbin/modprobe」とする(「which modprobe」で確認済み)
- 「echo ds3231 0x68 | tee /sys/class/i2c-adapter/i2c-1/new_device」とあるように、teeを入れる。
- 「sudo chmod 777 /etc/init.d/rtc_i2c」でrtc_i2cファイルを実行できるようにする。755のほうが良いかもしれない。
ここまでやったら、rtc_i2cコマンドの動作確認です。
sudo /etc/init.d/rtc_i2c start
エラーが起きなければ成功です。
さて、コマンドは作れましたが実はこのままではOS起動時にはrtc_i2cコマンドは実行されません。なので、systemdにサービスとして登録します。
/etc/systemd/system/rtc_i2c.service
[Unit]
Description=rtc i2c
After=network.service

[Service]
Type=simple
Restart=on-success
ExecStart=/etc/init.d/rtc_i2c start

[Install]
WantedBy=multi-user.target
あとは作成したサービスを有効にするだけです。
sudo systemctl daemon-reload
sudo systemctl enable rtc_i2c
念のため、nictのNTPサーバーと同期を取った後にRTCモジュールに書き込んでから再起動すると、timedatectlコマンドでRTC timeがきちんと取れていることが確認できるはずです。
sudo ntpdate ntp.nict.jp
sudo hwclock -w
sudo reboot
ここまではRTCモジュールの話でした。あとは、NTPサーバーに仕上げる話です。ntpdをインストールします。
sudo apt -y install ntp
ntp.confを書き換えます。ここは各自の好みですね。
/etc/ntp.conf
# /etc/ntp.conf, configuration for ntpd; see ntp.conf(5) for help

driftfile /var/lib/ntp/ntp.drift

# Leap seconds definition provided by tzdata
leapfile /usr/share/zoneinfo/leap-seconds.list

# Enable this if you want statistics to be logged.
#statsdir /var/log/ntpstats/

statistics loopstats peerstats clockstats
filegen loopstats file loopstats type day enable
filegen peerstats file peerstats type day enable
filegen clockstats file clockstats type day enable

# Specify one or more NTP servers.

# Use servers from the NTP Pool Project. Approved by Ubuntu Technical Board
# on 2011-02-08 (LP: #104525). See http://www.pool.ntp.org/join.html for
# more information.
#pool 0.ubuntu.pool.ntp.org iburst
#pool 1.ubuntu.pool.ntp.org iburst
#pool 2.ubuntu.pool.ntp.org iburst
#pool 3.ubuntu.pool.ntp.org iburst

# Use Ubuntu's ntp server as a fallback.
#pool ntp.ubuntu.com
pool ntp.nict.jp iburst

# Access control configuration; see /usr/share/doc/ntp-doc/html/accopt.html for
# details.  The web page <http://support.ntp.org/bin/view/Support/AccessRestrictions>
# might also be helpful.
#
# Note that "restrict" applies to both servers and clients, so a configuration
# that might be intended to block requests from certain clients could also end
# up blocking replies from your own upstream servers.

# By default, exchange time with everybody, but don't allow configuration.
restrict -4 default kod notrap nomodify nopeer noquery limited
restrict -6 default kod notrap nomodify nopeer noquery limited

# Local users may interrogate the ntp server more closely.
restrict 127.0.0.1
restrict ::1
restrict 192.168.0.0 mask 255.255.255.0 nomodify notrap

# Needed for adding pool entries
restrict source notrap nomodify noquery

# Clients from this (example!) subnet have unlimited access, but only if
# cryptographically authenticated.
#restrict 192.168.123.0 mask 255.255.255.0 notrust


# If you want to provide time to your local subnet, change the next line.
# (Again, the address is an example only.)
#broadcast 192.168.123.255

# If you want to listen to time broadcasts on your local subnet, de-comment the
# next lines.  Please do this only if you trust everybody on the network!
#disable auth
#broadcastclient
「restrict 192.168.0.0 mask 255.255.255.0 nomodify notrap」の部分は、自分のLANの環境に合わせてください。
実際に動くか確認します。
sudo systemctl restart ntp
NTPサービスは動くようになりましたが、まだ別のマシンから問い合わせができるようにはなっていません。firewalld関係を設定していきます。
sudo apt install -y firewalld
sudo firewall-cmd --add-service=ntp  --permanent
sudo firewall-cmd --reload
これでIPアドレスでの問い合わせはできるはずです。このままでもいいのですが、ついでにavahiでmDNS問い合わせをできるようにしてしまします。
sudo apt install avahi-daemon
sudo systemctl enable avahi-daemon
「/etc/hostname」の中身は、わかりやすい名前に書き換えておきましょう。このファイルで指定した名前に「.local」がついた形でアクセスできるようになります。
sudo firewall-cmd --add-service=mdns  --permanent
sudo firewall-cmd --reload
でmdnsを外から問い合わせできるようにしておきます。念のため、「/etc/nsswitch.conf」は以下のように書き換えてみました。
# /etc/nsswitch.conf
#
# Example configuration of GNU Name Service Switch functionality.
# If you have the `glibc-doc-reference' and `info' packages installed, try:
# `info libc "Name Service Switch"' for information about this file.

passwd:         files systemd
group:          files systemd
shadow:         files
gshadow:        files

hosts:          files mdns_minimal [NOTFOUND=return] dns
networks:       files

protocols:      db files
services:       db files
ethers:         db files
rpc:            db files

netgroup:       nis
ここまでやって再起動したらほとんど終わりです。念のため、「sudo hwclock --adjust 」しておきました。
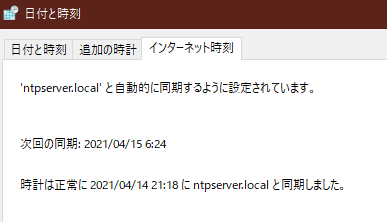
これでNTPサーバー側は終わりです。あとはクライアント側でこのNTPサーバーに問い合わせに行くようにしてみます。まずはWindowsです。コントロールパネルで設定すると、以下のようになります。
他のUbuntu Serverでは、「/etc/systemd/timesyncd.conf」にNTPサーバーを指定します。なお、IPアドレスで指定しない場合はavahi-daemonパッケージをインストールしておきます。
#  This file is part of systemd.
#
#  systemd is free software; you can redistribute it and/or modify it
#  under the terms of the GNU Lesser General Public License as published by
#  the Free Software Foundation; either version 2.1 of the License, or
#  (at your option) any later version.
#
# Entries in this file show the compile time defaults.
# You can change settings by editing this file.
# Defaults can be restored by simply deleting this file.
#
# See timesyncd.conf(5) for details.

[Time]
NTP=ntpserver.local
#FallbackNTP=ntp.ubuntu.com
#RootDistanceMaxSec=5
#PollIntervalMinSec=32
#PollIntervalMaxSec=2048
iOSは面倒そうなのでやりません。Androidは、私の場合は外に持ち出すものなので設定しませんでした。
こんな感じでNTPサーバーを立ち上げられるはずです。RTCモジュールをつけたので、万が一インターネットから切断されてもそれなりに動くと思います。
最後に、参考にしたページを貼り付けます。
wiki.seeedstudio.com
qiita.com
qiita.com
www.server-world.info
www.projectgroup.info
www.server-world.info